In January, 2008 I put
together the WKUSB CW keyer kit. This was a Christmas
present from my father-in-law and was something I had been
looking forward to completing. This is my third morse code
keyer kit from
K1EL
- having previously completed the K20 and the WinKey (aka
Winkey1).
Once Steve made the new WKUSB
keyer available (aka WinKeyer USB), I decided that it would
be my next keyer for the following reasons:
It comes with a great
enclosure. Enclosures have always been a weak link in my
previous kits. Some guys have a knack for making a kit
with a great looking enclosure. Not me. My previous kits
have been quite ugly.
USB interface to the PC. My
ham shack has transitioned in the past few years from a
desktop PC to a decent laptop. The problem with laptops
lately though is a lack of serial ports (RS232). Rather than
go through a USB to RS232 converter and add more complexity,
this kit offers a direct USB connection to the PC.
More bells and whistles
added to the next generation of K1EL keyers. Steve seems
to always throw in a few extra features with each
revision... even if I won't use them all, it's good to
know they are there :).
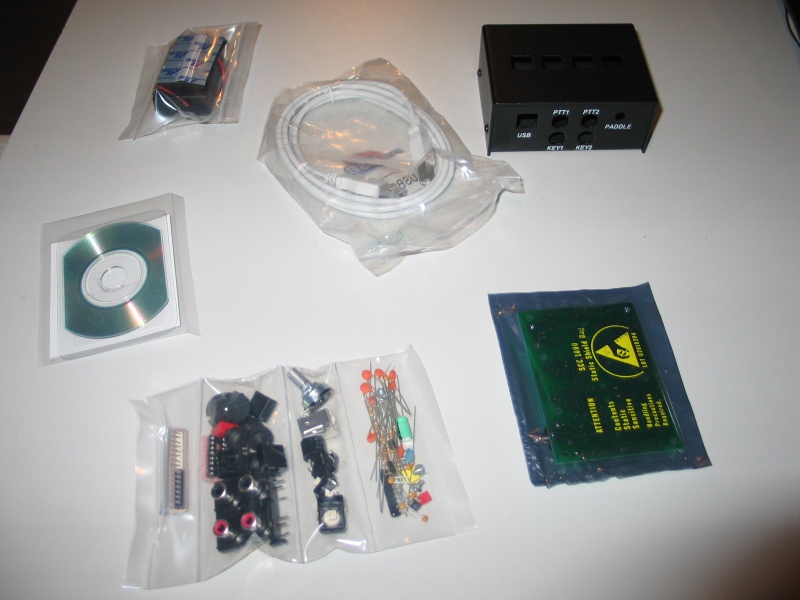
Unpacking the WKUSB
You'll want to take an
inventory of the parts once you open the box. The K1EL team
packs things neatly. Click on the image to the left and
you'll see that everything was well organized and sealed
tightly to keep it fresh.
Every part was accounted for
in my WKUSB - so I was ready to move onto the next step...
soldering the keyer.
Soldering and testing the WKUSB keyer
Soldering
components to the WKUSB is not too difficult and experienced
kit builders will breeze through the instructions in less
than an hour. Even beginners should be able to tackle this
once they've mastered some basic soldering skills.
In my case, I took about two
hours (with interruptions). By the way, if you are looking
for an extra challenge, try building the keyer with your 5
year old daughter asking questions the whole time.
Once you've added the
components to the board, you'll want to test it with the PC
and provided software. The test worked great for me - which
meant no solder bridges or other mistakes.
Final Assembly, Keying Cable and Using the WKUSB keyer
Once
the testing is completed, you are ready to install the board
in the enclosure. This can be a little tricky as it is a
tight fit. Follow the instructions and be patient and you'll
get it.
The WKUSB
enclosure was a big selling point for me. I've
constructed several kits in the past that have worked fine
but looked awful. It was nice to know the enclosure would
ensure a good looking final product. The WKUSB enclosure has
a clean fit and finish, easy to access buttons and
connectors and just plain looks good.
The
back panel of the keyer enclosure offers the USB connection,
keyer (rig) connectors and a paddle input.
To connect the keyer to my
Icom, I ordered a cable with a male RCA connector on one end
and a male TS on the other. The K1EL site recommended this
cable from
sweetwater.com ($3.29 with a 5' cable including free
shipping).
This was a fun kit to build
and the WKUSB seems to meet my needs.